
VRoid/VRMの表情を編集・追加する方法について説明しています。
VRoid Studioで編集
VRoid Studioではデフォルトで用意されている表情の編集のみ可能。新規で表情を追加したい場合はBlenderもしくはUnityでやる必要あり(後述)。
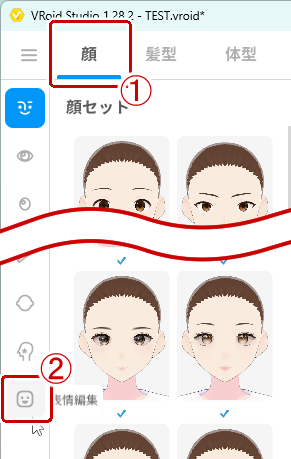
表情を編集したいモデルを選択し、顔タブから「表情編集」を選択する。
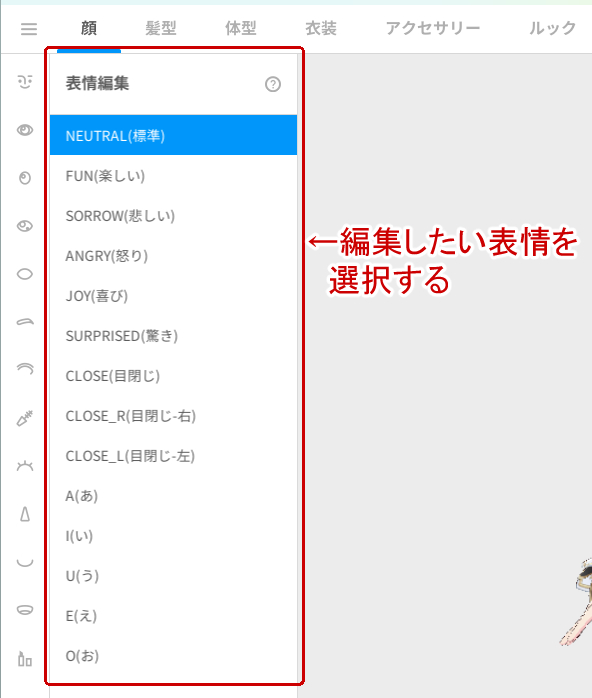
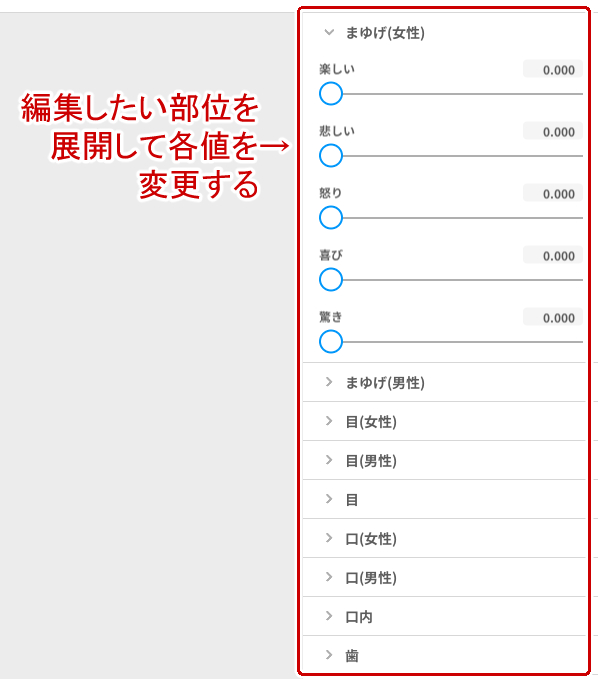
表情編集画面になったら編集したい表情を選択し、右側の各部位を展開して値を変更する。
設定後はVRoid HubにアップロードやVRMエクスポートなどをしても内容が保持される。
Blenderで編集する
BlenderでVRMの表情編集をする場合は専用のアドオンが必要。詳しくは以下の記事にて。

表情を編集する
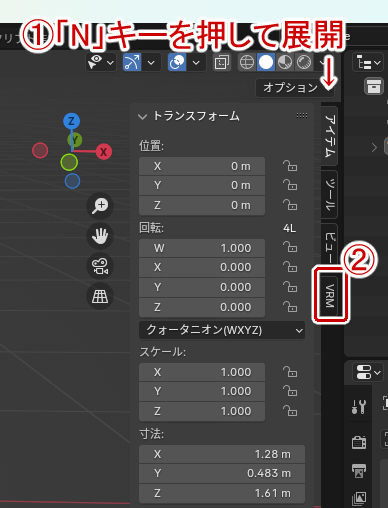
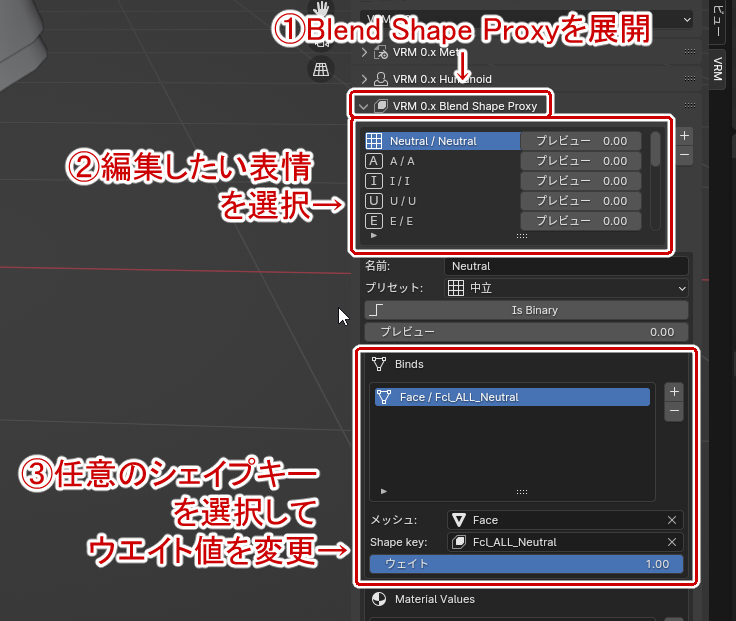
BlenderでVRMファイルを読み込んだら3Dビューポート上で「N」キーを押し、右側に出てくるタブから「VRM」を選択する。
「VRM x.x Blend Shape Proxy」をクリックして展開し、編集したい表情を選択する。そして「Binds」から任意のシェイプキーを選択してウエイト値を変更する。
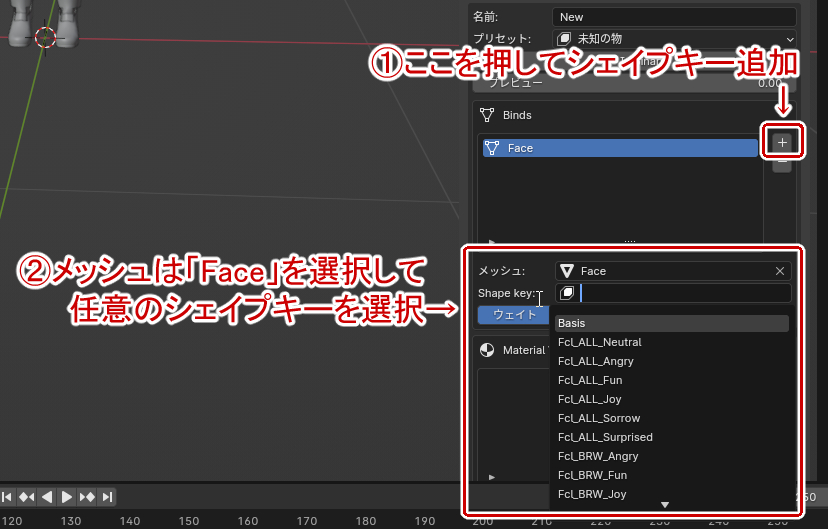
シェイプキーについて最初から表示されているシェイプキー以外のものも追加して組み合わせることができる。他のシェイプキーを追加したい場合は「Binds」の「+」をクリックし→メッシュで「Face」を選択→「Shape Key」から任意のシェイプキーを選択する。
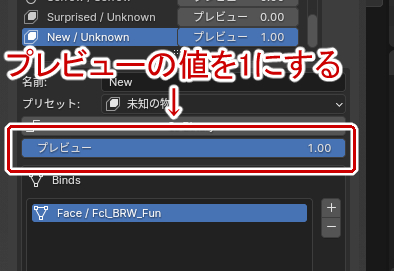
表情を確認したい場合は「プレビュー」の値を1にする。
表情を追加する
新規で表情を追加する場合は上と同じ手順で「VRM x.x Blend Shape Proxy」を展開し、表情一覧の横にある「+」をクリックする。
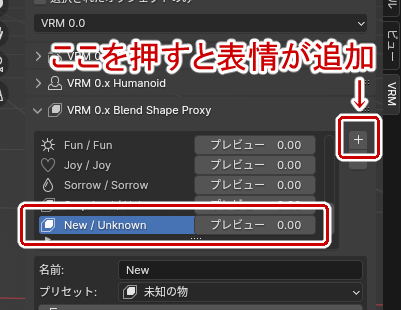
追加したら表情の名前を設定する。日本語で入力すると不具合が出る可能性があるので半角英数字推奨。プリセット名は「未知の物(Unknown)」のままにしておくのが無難。
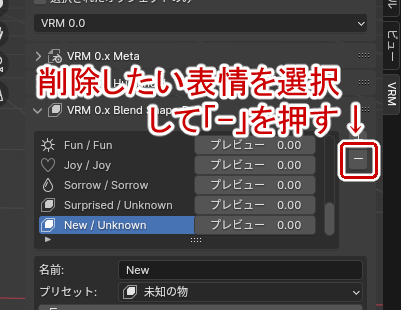
表情を削除したい場合は削除したい表情を選択して「-」をクリックする。
Unityで編集する
UnityでVRMの表情編集をする場合も専用のアドオンが必要。詳しくは以下の記事にて。
表情を編集する
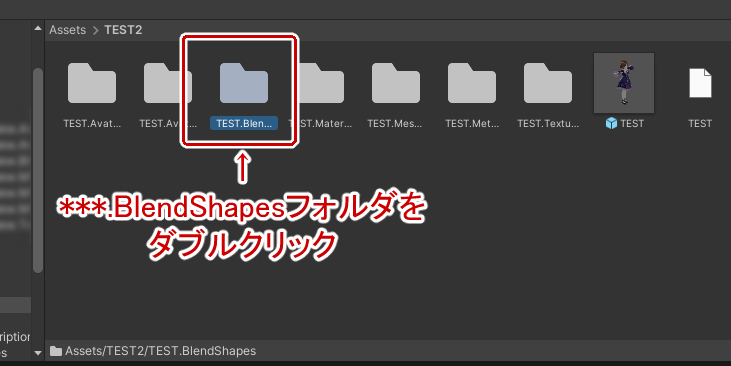
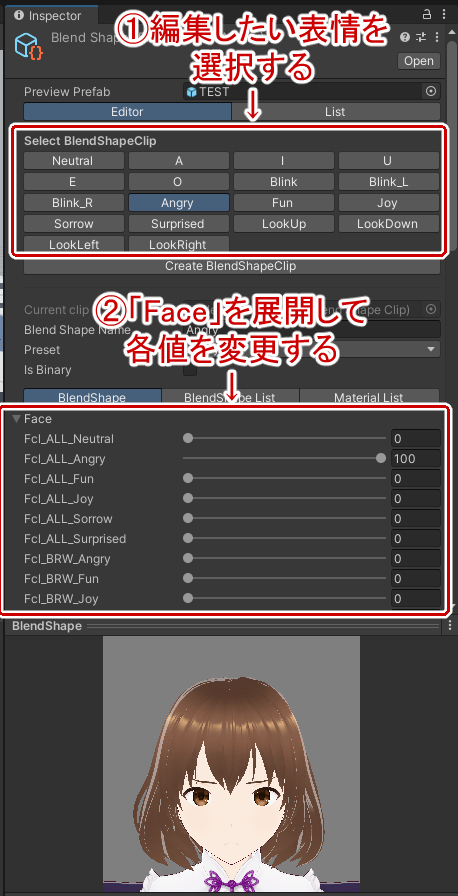
UnityにVRMモデルを読み込ませたら***.BlendShapesフォルダをダブルクリックする。
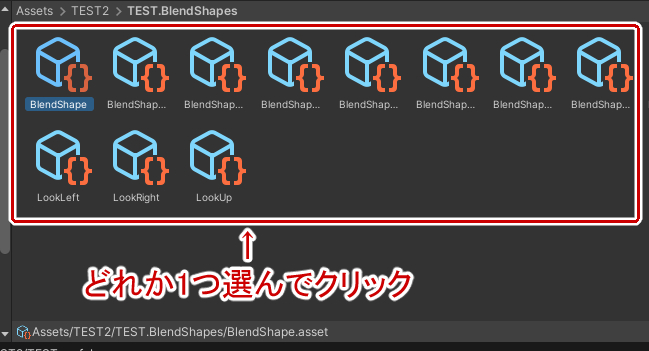
BlendShapes一覧が出てくるのでどれか1つクリックする。
インスペクター画面にBlend ShapeProxyが出てくるのでそこから編集したい表情を選択し、下の「Face」を展開して各値を変更する。
表情を追加する
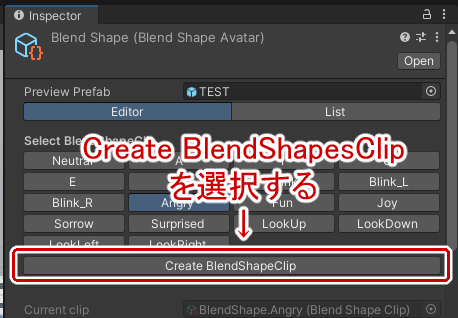
表情を追加する場合は上と同じ手順でインスペクター画面にBlend Shape Proxyを表示させて「Create BlendShapeClip」をクリックする。
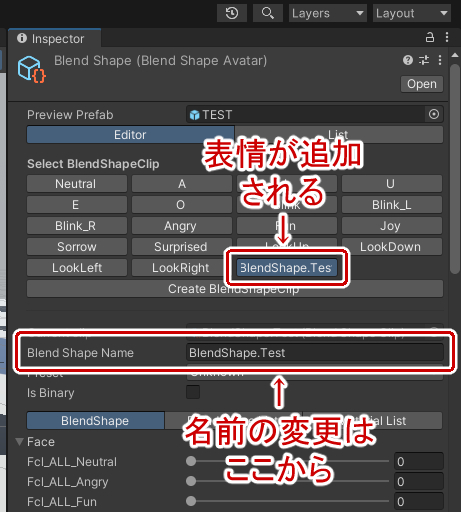
新しいBlendShapeClipの名前の入力が求められるので入力する。入力したら表情一覧に新しい表情が追加される。デフォルトでは先ほど入力したBlendShapeClipの名前のままになるので下の「Blend Shape Name」から表情名を変更する。どちらも日本語だと不具合が出る可能性があるので半角英数字推奨。
表情を削除したい場合はBlendShapesフォルダから削除したい表情にあたるBlendShapeClipを削除する。
コメント